Linux | 树莓派4b 视频输出配置 HDMI 分辨率设置
Linux | 树莓派4b 设置 HDMI 分辨率(基于Ubuntu18)
通常电脑都有Bois设置,树莓派则通过config.txt配置参数,存储在名为的可选文本文件中config.txt
在初始化ARM CPU和Linux之前,GPU会读取这个文件。因此,它必须位于SD卡的第一个(引导)分区上,并在bootcode.bin和start.elf的旁边。
该文件可设置超频、显示、输入输出等功能。
具体介绍在树莓派官方文档有介绍
本文介绍通过修改config.txt从而设置HDMI模式
在修改该文件之前一定要
备份你的config.txt !
备份你的config.txt !
备份你的config.txt !
错误的修改或者不同的系统可能会导致显示或者开机不正常,一定要备份好文件
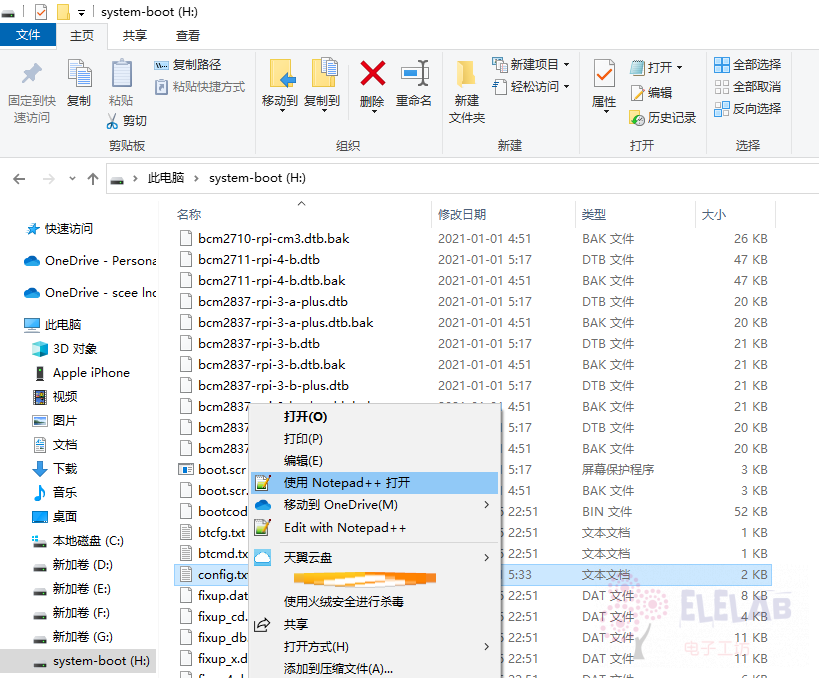
1. 打开配置文件
将读卡器插入设备,打开根目录下的/config.txt文件

2. 修改config.txt配置
- 修改overscan选项 – 设置是否启用屏幕过扫描
# uncomment this if your display has a black border of unused pixels visible
# and your display can output without overscan
disable_overscan=1
- 修改画面整体移动一定长度,以像素为单位 – 如果树莓派的显示超出了屏幕的边界,调整overscan选项可以来修正这种情况。配置项对应的值是需要移动的像素的数量。
# uncomment the following to adjust overscan. Use positive numbers if console
# goes off screen, and negative if there is too much border
overscan_left=0
overscan_right=0
overscan_top=0
overscan_bottom=0
- 强制设置屏幕分辨率
# uncomment to force a console size. By default it will be display's size minus
# overscan.
#framebuffer_width=1280
#framebuffer_height=720
- 定义HDMI输出格式 – 选择屏幕分辨率和刷新屏幕。
# uncomment to force a specific HDMI mode (this will force VGA)
hdmi_group=2
hdmi_mode=87
- 强制使用HDMI – 即便没有检测到HDMI显示器(VNC需要开启)
# uncomment if hdmi display is not detected and composite is being output
hdmi_force_hotplug=1
- 自定义模式 – 如果您的显示器要求的模式不在上表之一中,则可以为其定义自定义CVT模式:
格式是:hdmi_cvt=<width> <height> <framerate> <aspect> <margins> <interlace> <rb>
例如设置屏幕分辨率1024*600 60Hz
hdmi_cvt=1204 600 60 3 0 0 0
建议使用notepad、vscode这些软件修改,以免弄个特殊符号翻车!


